Back in 2016 I was notified of a client who was looking to commission a painter based in the U.S.A, to work on something huge, The full imperial fist chapter in epic scale, so I reached out to him, even though I was based in the UK.
After a wee chat, it was agreed that we were both happy to work with each other to get this once in a life time project on to the table top.
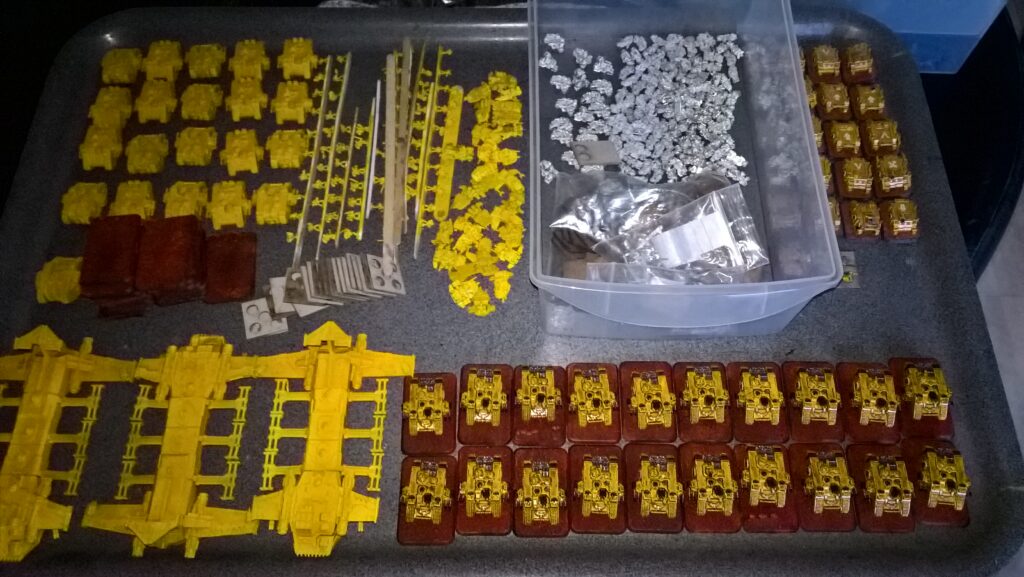
When the box of 6mm tanks and troops arrived, I was greeted by a box weighing in excess of 19kg, Smothered with import stickers, delivered by a struggling postal worker (poor guy). opening the box it contained a plastic storage box that had seen better days, but had done its duty and protected the contents. The kits themselves were the super detailed metal Forum ware kits.The tanks were multipart kits and the part count was insane. The number of tanks the project contained staggered me a little at first. I am talking in excess of 350 rhino chassis, with multiple options.
Forum ware were one of the best providers of a dead system, unsupported by GW for many years producing detailed metal miniatures at a 6mm scale for all the 40k vehicles of the time. The epic scene these days is purely a fan backed system, with designers creating many rule sets, and some surprisingly detailed miniatures. Adeptus Titanicus gets released whilst I am working on this project, and forum ware metal disappears, presumably due to some c and d letters sent to Australia ( first rule of fight club).
Each unit was in their own poly bag, that in turn was in its own company bag. this made for easy counting, and aided in the creation of the production lines.
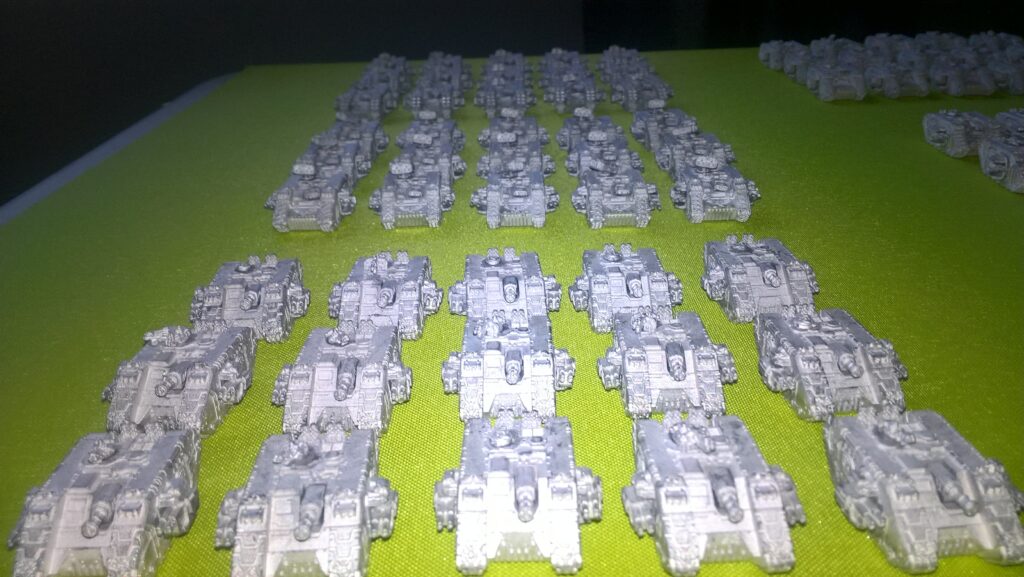
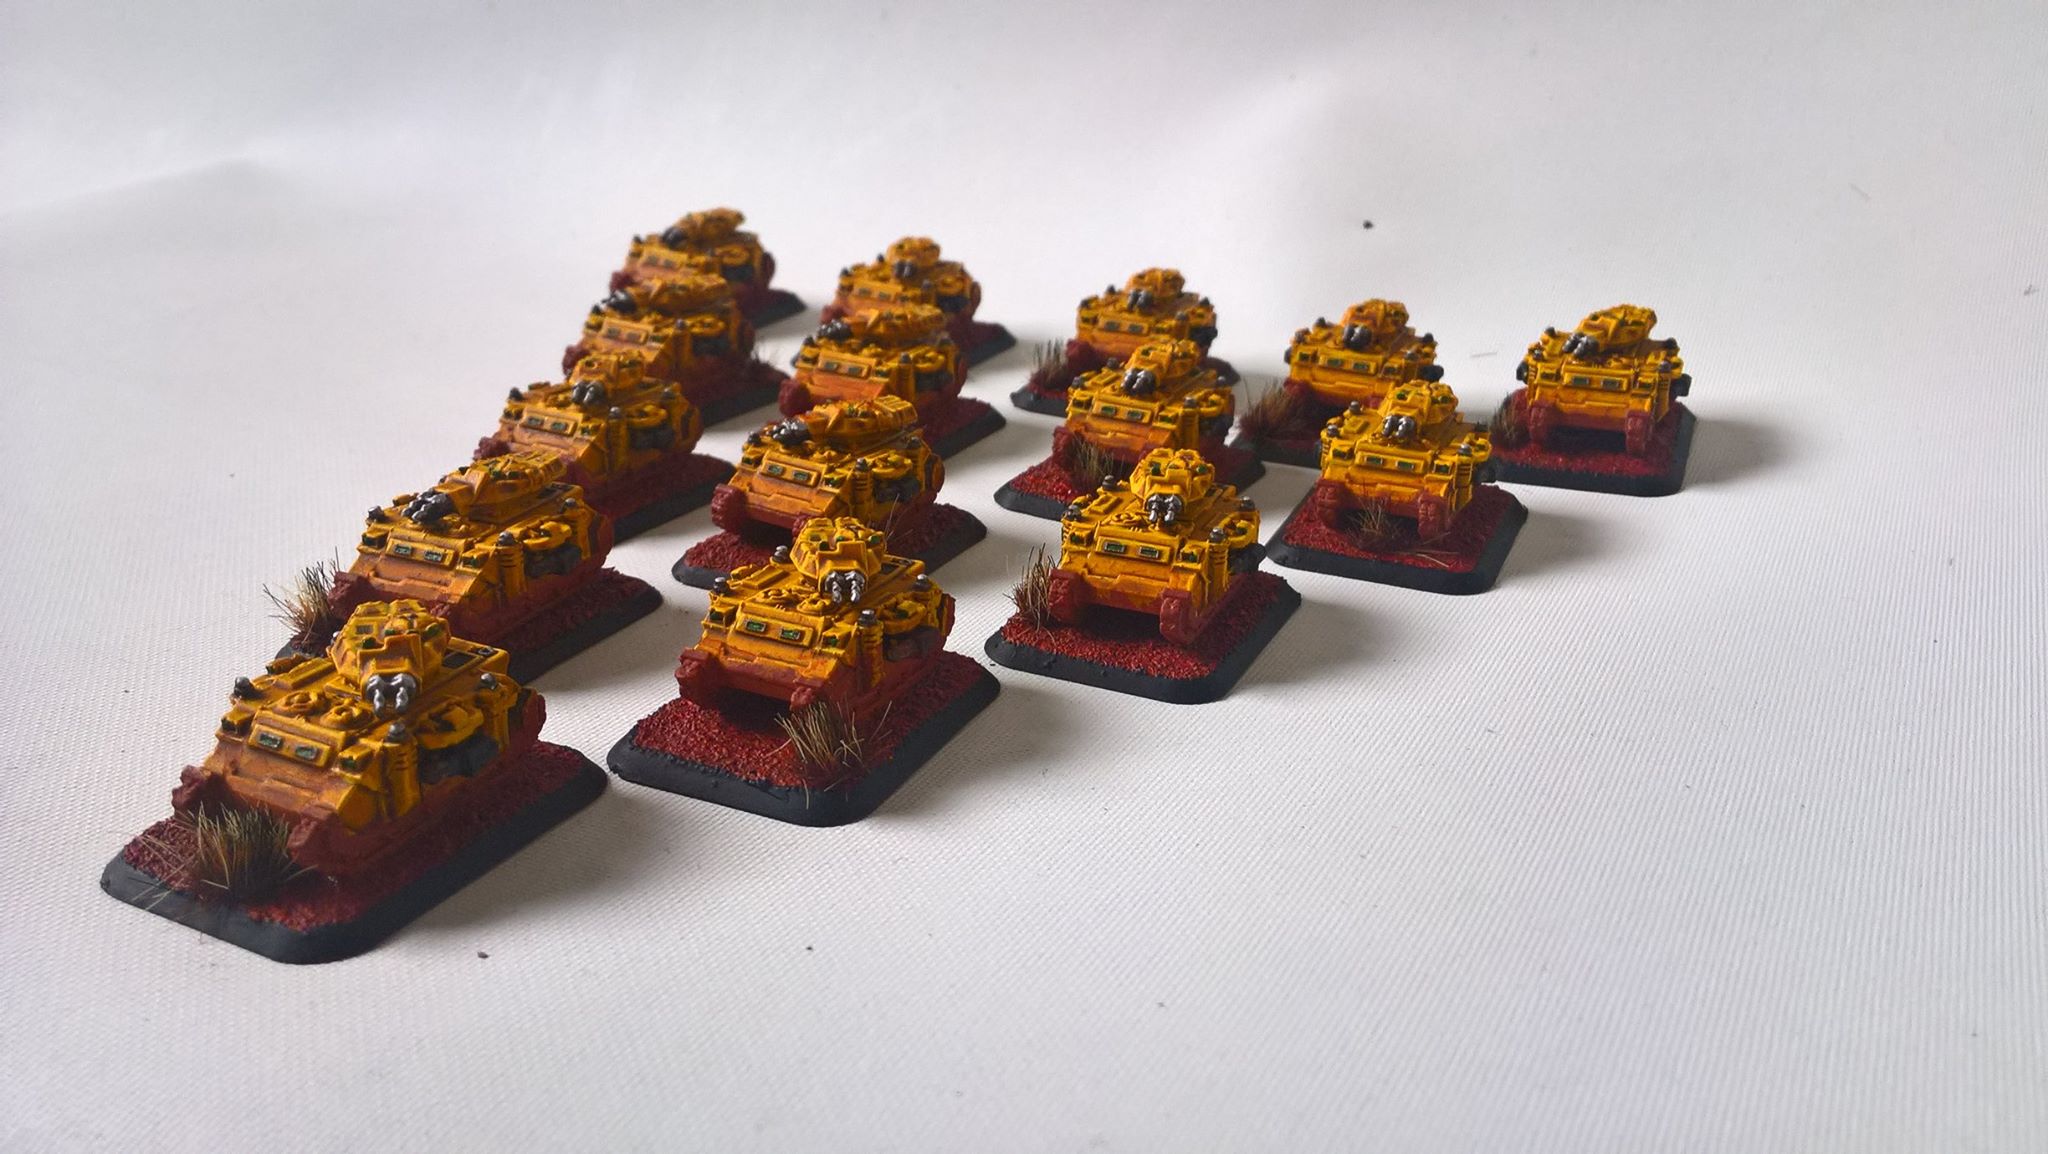
Building the armoured element of the chapter was very easy, removing a few gates and thankfully minimal mould lines, a spot or two of super glue and the kits are built. No need for pinning these, as they will all be mounted on bases, providing additional structural support. Having chapter specific doors was a great detail, these worked with a few of the flyers, as well as the Landraider and rhino sized chassis. Working by tank type, it was easy to start getting this element underway.
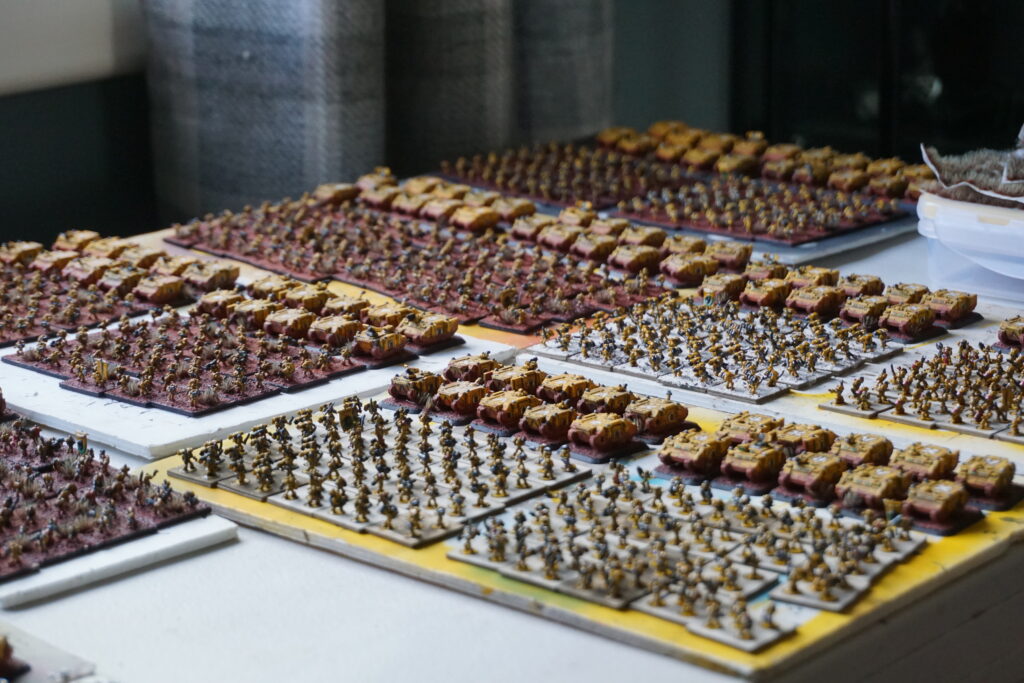
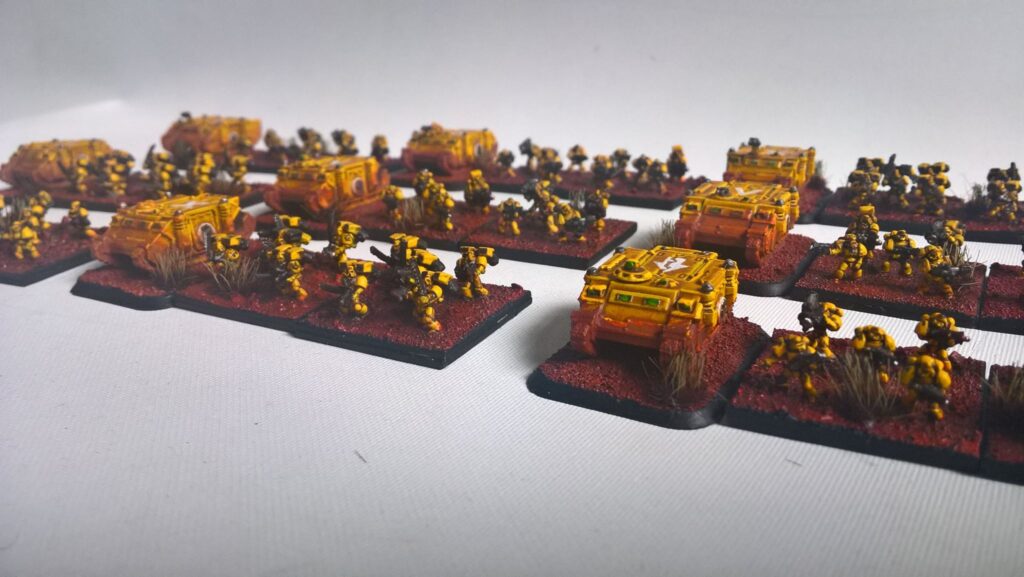
The infantry were stuck on wooden ice cream sticks, at first with double sided tape, and as time progresses the method was changed to hot glue. This enabled me to attach 10 marines per stick and they were then Ready to paint. Setting these up this way let me work on a company by company basis and this worked extremely well. The infantry had different weapons and a secret recipe for the base make up was there to follow, all though initially this was very confusing. But by the end, it all made sense. A total of 14 companies were included in the chapter.
The project was fully mechanised, with each infantry unit having its own dedicated transport. (That’s a whole lot of rhinos.)
My client showed me some examples of work he liked and one included a recipe to follow. This recipe in itself, although not mine, made for a simple pallet, and it proved fast to knock out units very easily. Initially the project was to receive weathering and battle damage, but the miniatures became too busy at this scale, so it was left off.
Pigment powder was used, initially a brand from FW, this pigment was the best pigment I have used, until they disbanded the product, forcing me to find a substitute.
((typical GW, changing paints, removing and adding, that is why I try my very best to avoid the brand as much a possible, sticking with more consistent manufacturer’s))
I knew from the get go, a production line type approach to this project was required, with a fair bit built, ready to paint, and starting to run out of room, the compressor was turned on, and the lines were started. On the occasional heat wave, one of the curing times was substantially reduced with direct sunlight, this was a blessing and accounts for many saved hours with drying time.

The actual recipe and method used.
- prime
- layer
- highlight
- block in details, metallic parts, weapons, lenses, etc
- add decals/free hand
- Quickshade
- edge high light
- pigments
- fix to base
- varnish back to Matt
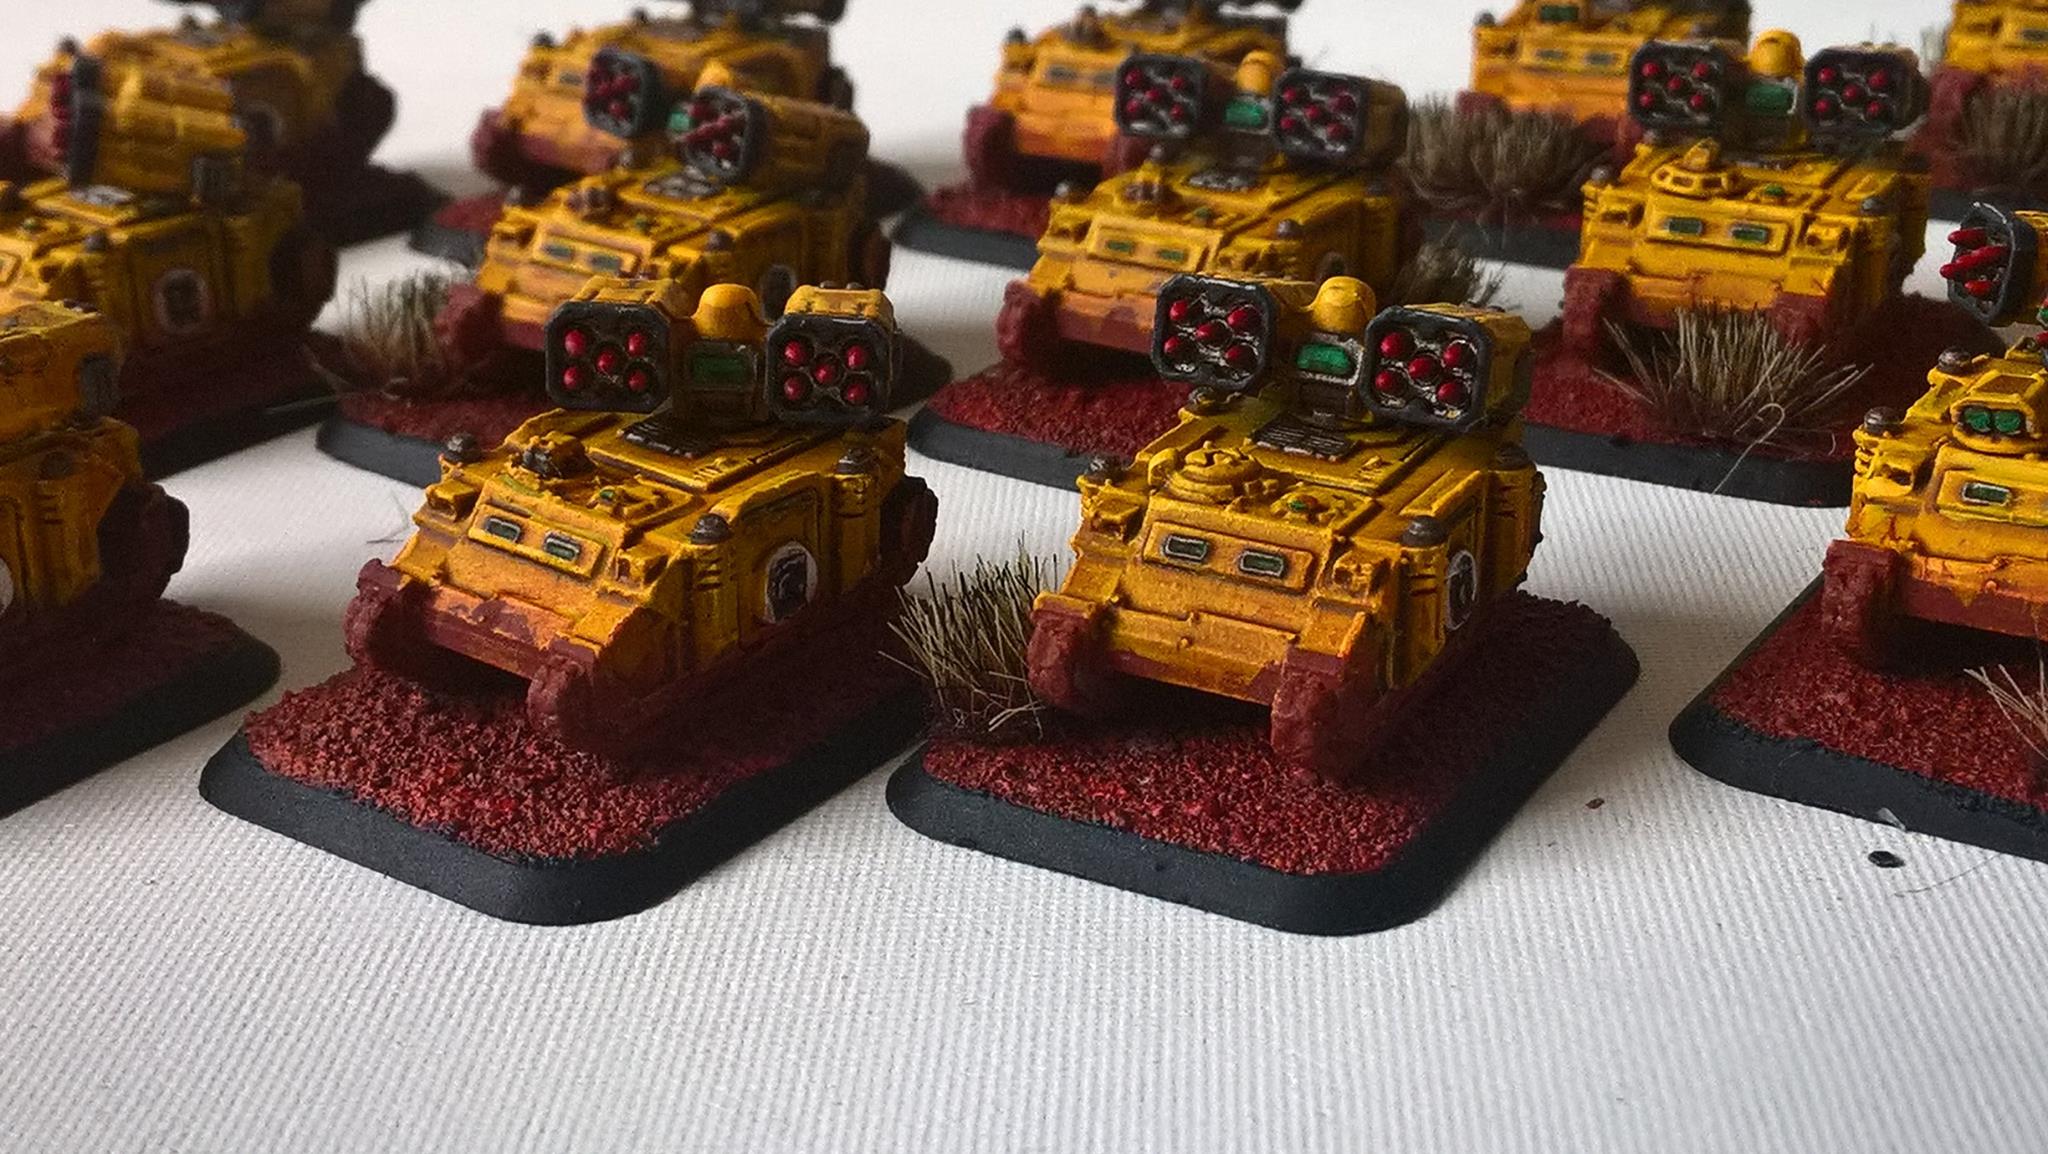
The bases would in turn effect the end product, with one of the elements directly effecting the final product, a few tests were done, and the final result was to have the chapter on a Martian base, tying into the model through pigments. The process of doing the bases are as listed
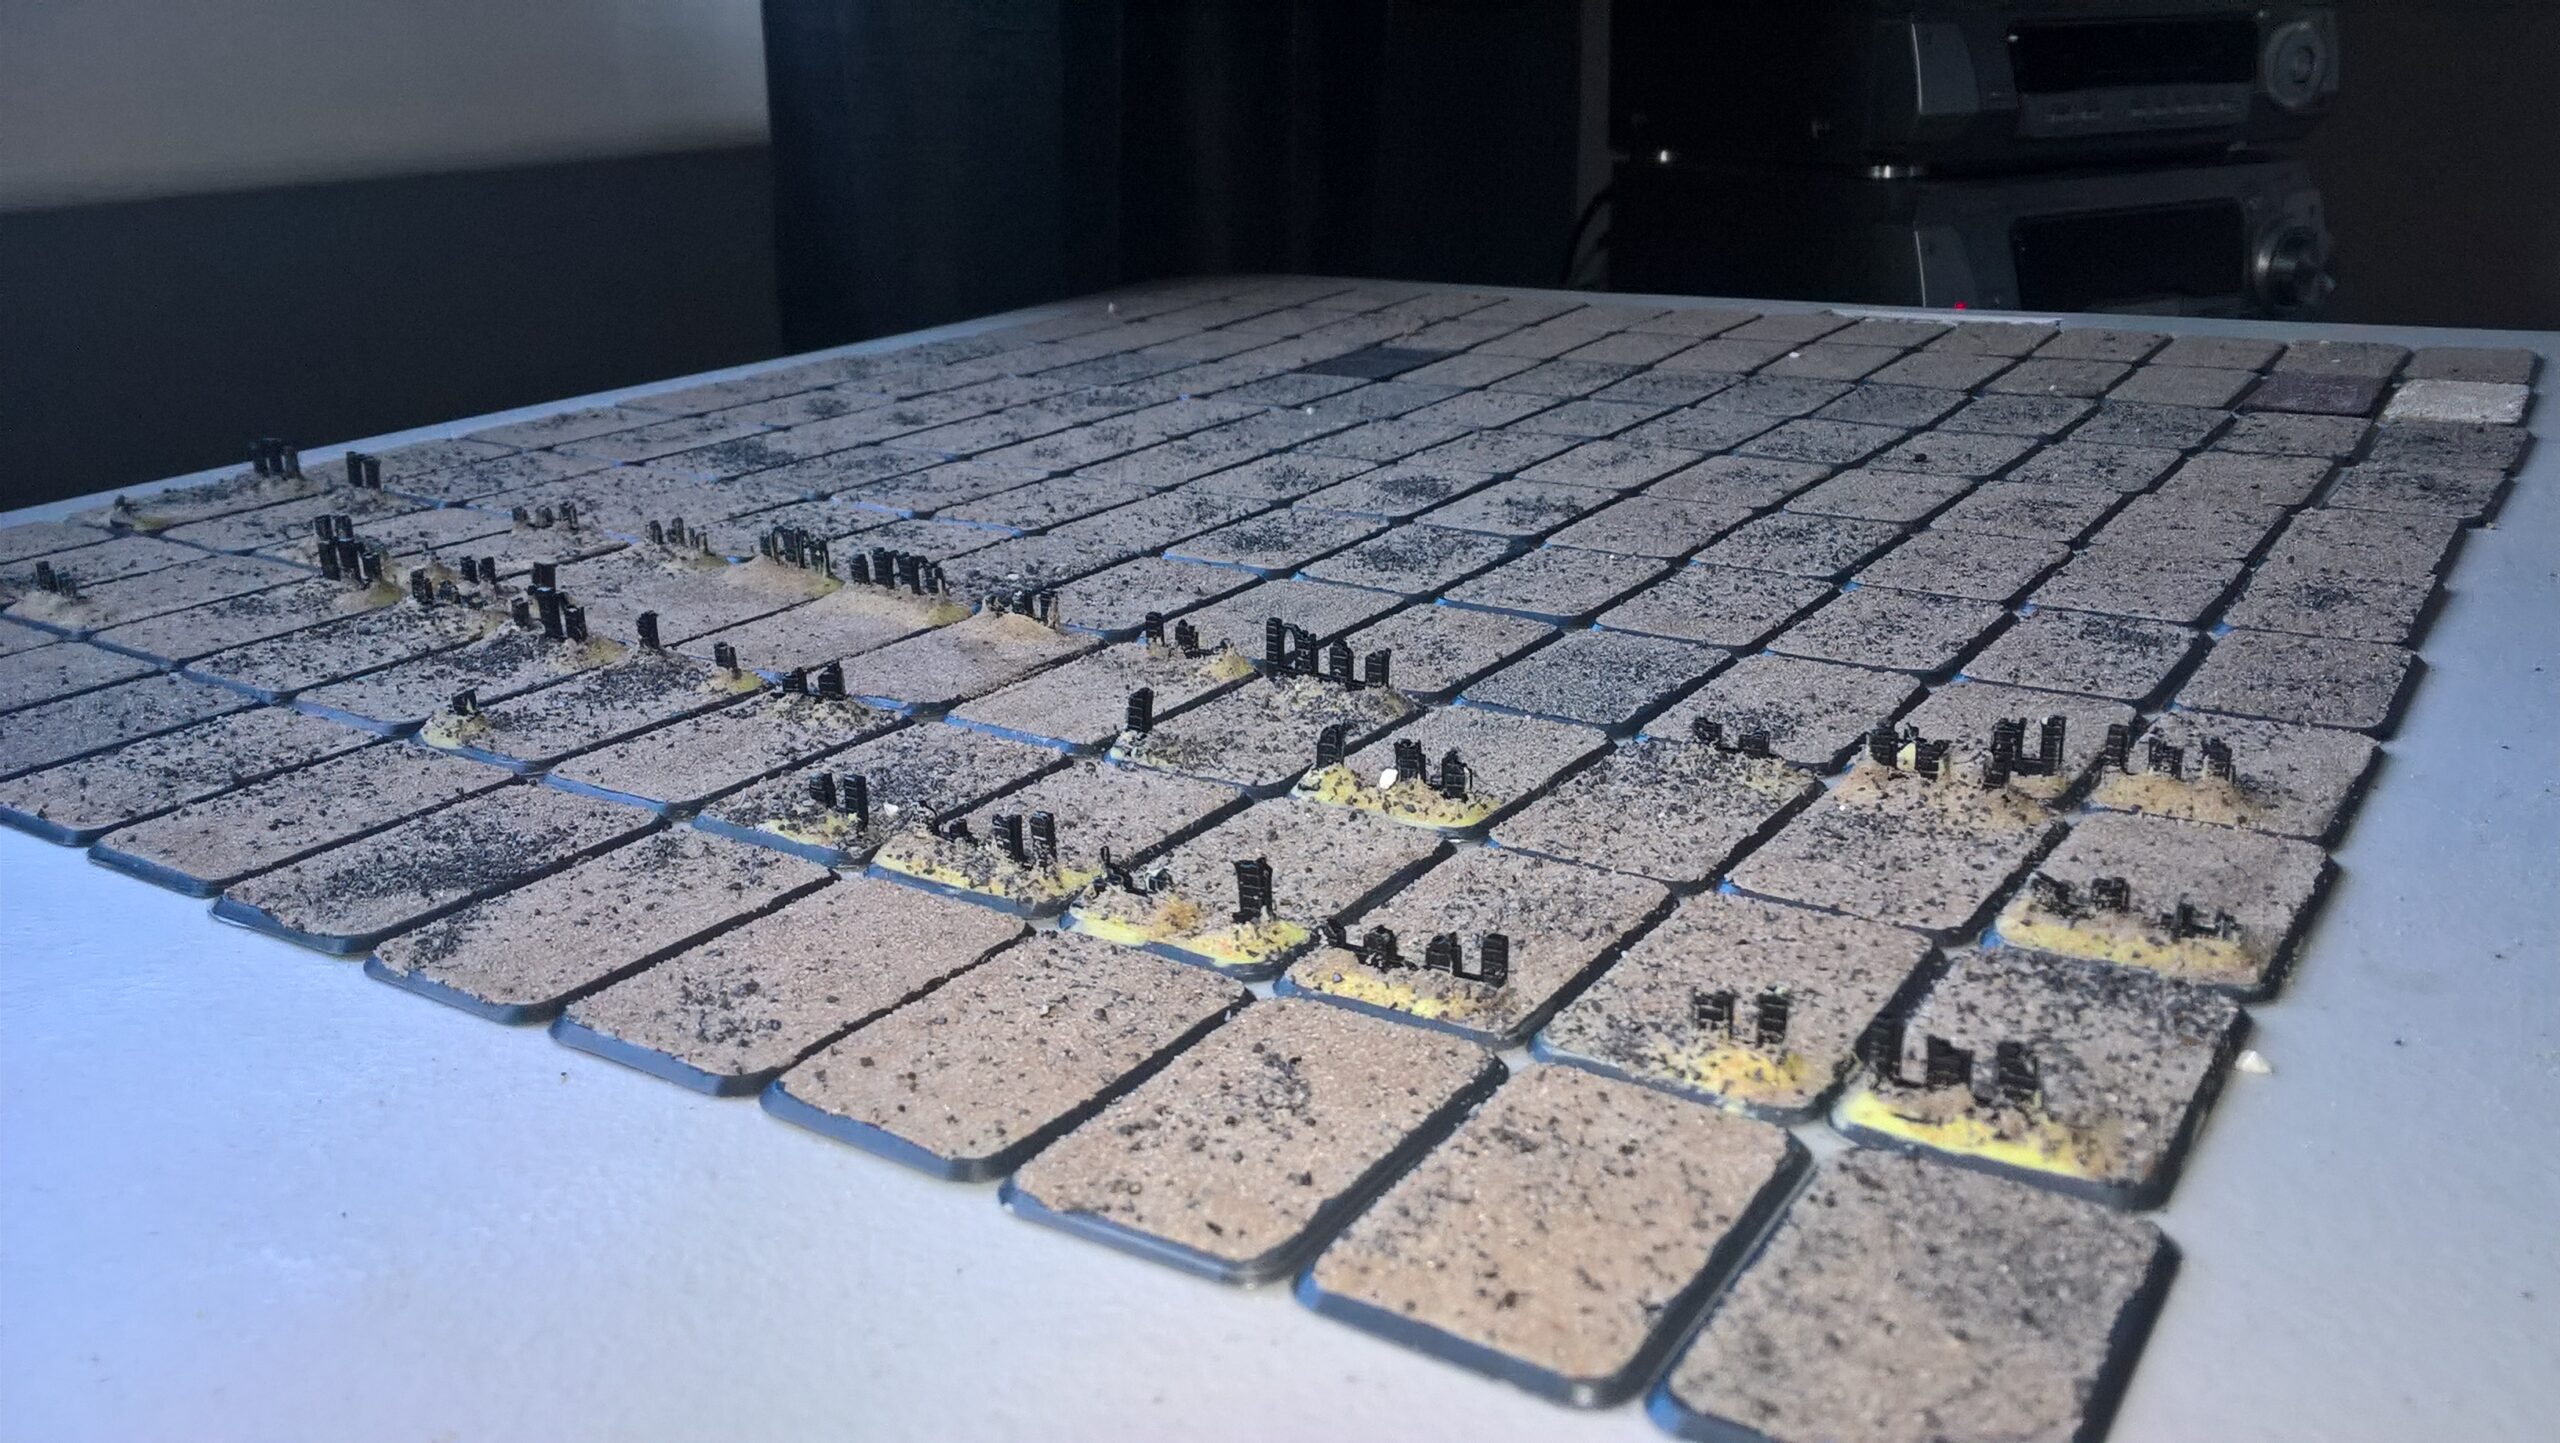
- Cut down ruins and attach on the bases with a gel based super glue (so not to obstruct the placement of the model)
- Back fill the ruins with Milleput creating a smoother transition
- Paint the area you want covered in sand with PVA glue
- pour sand over the base
- When dry, tip the sand from the base
- prime
- base coat
- heavy drybrush
- light drybrush
- black base rim
There were a lot of old ruins available from the old GW frames, these were perfect for the over all effect of the project, and added a detail to the bases that was needed, adding a tuft of burnt grass, in hindsight, was not in keeping with a Martian styled base, although it breaks up the base, was maybe not needed. The bases were similarly a production line set up.

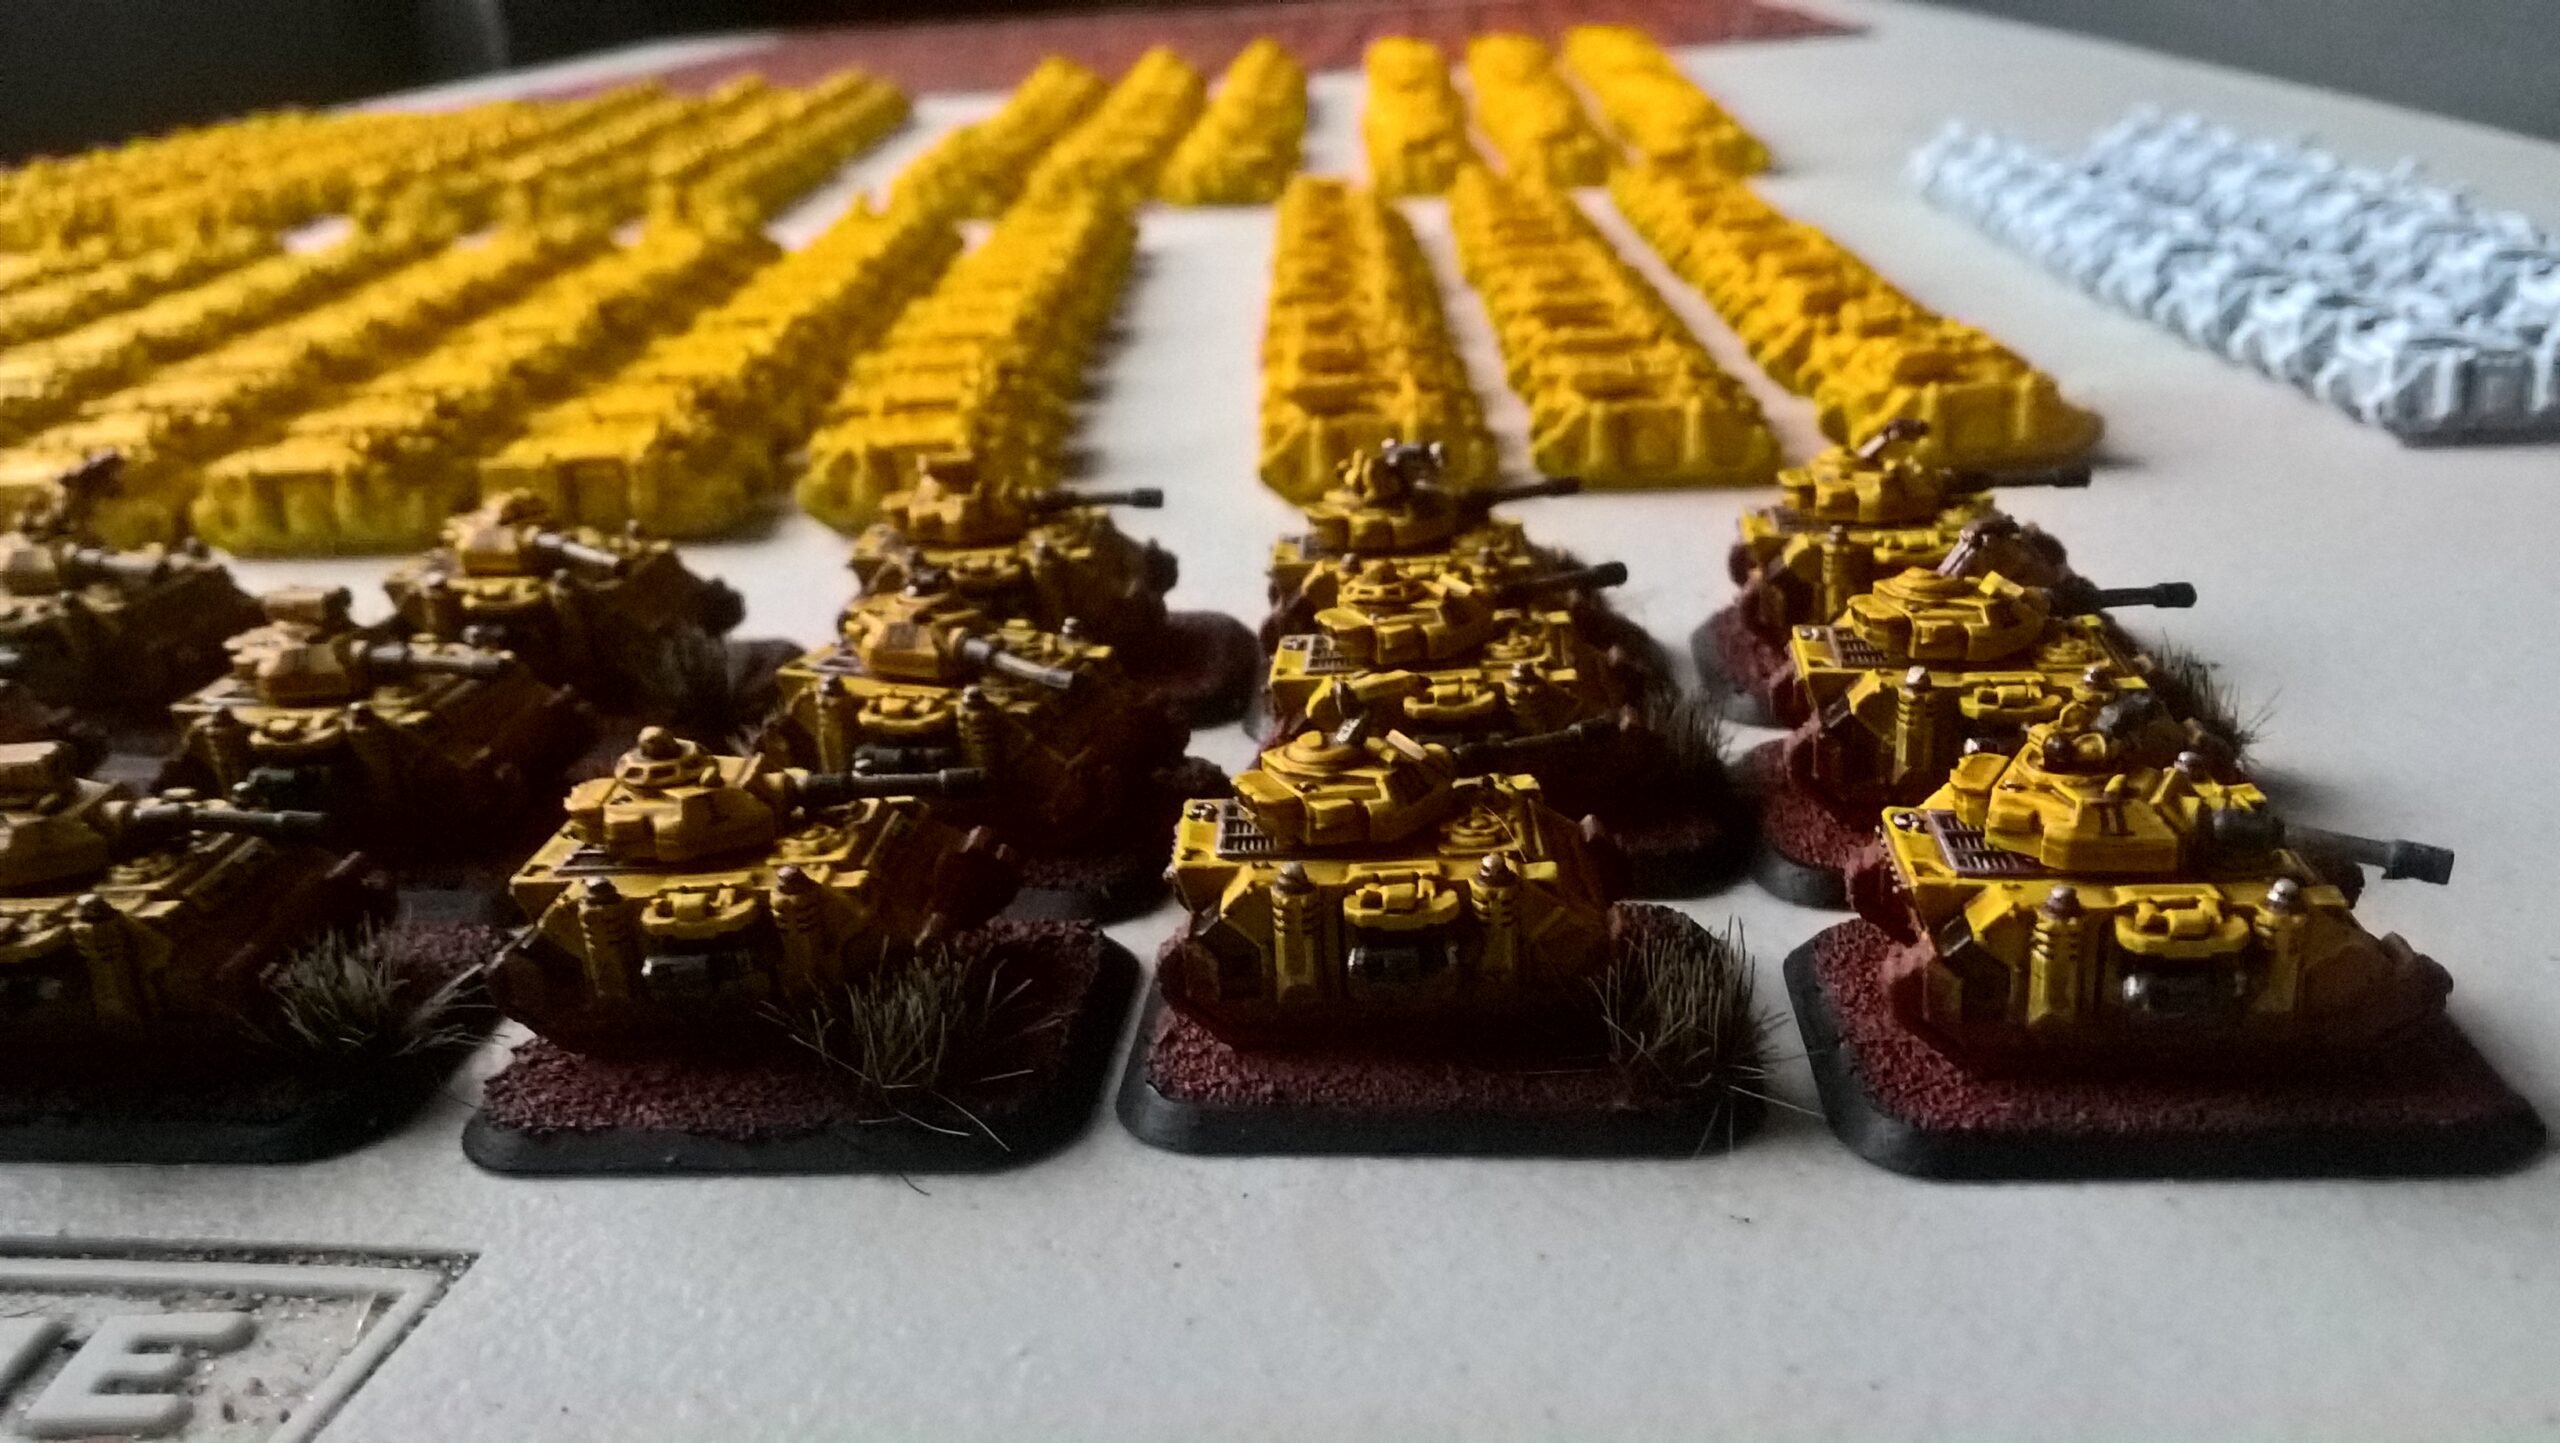
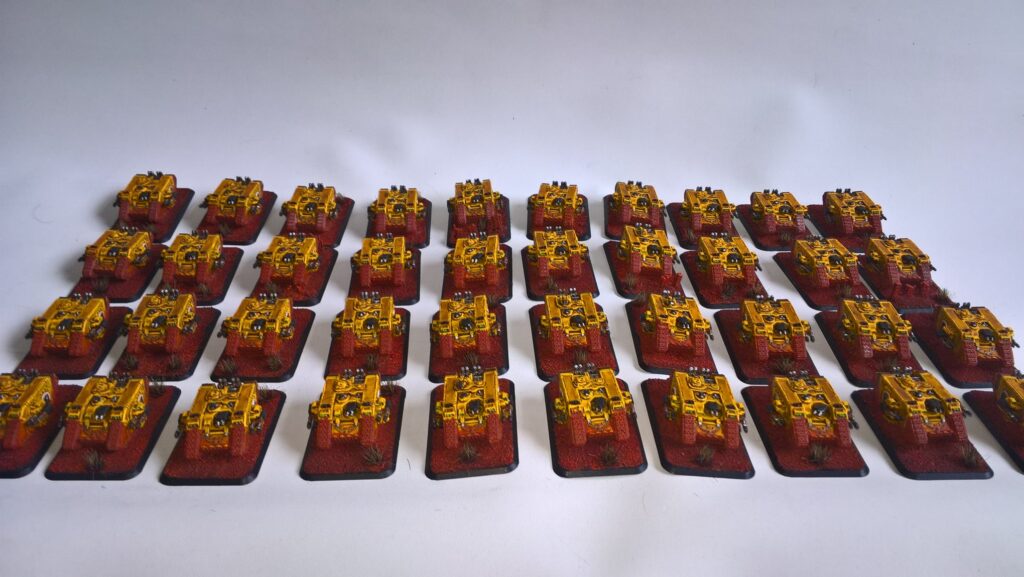
A full chapter is a whole lot of miniatures even at 6mm so it was broken down into sections.
Artillery.
The artillery, was made up of support weapons like quad mortars, rapiers and the like with 2 servitor crew that required bases to be found. With the 2 servitors needing to be flush into the base, I reached out to bases of war for help with this issue. A design was created to have the weapon platform and the 2 servitors to fit on the standard tank base. I received the sample in quick time, making minor alterations, the final design was agreed and an order for a few was placed.
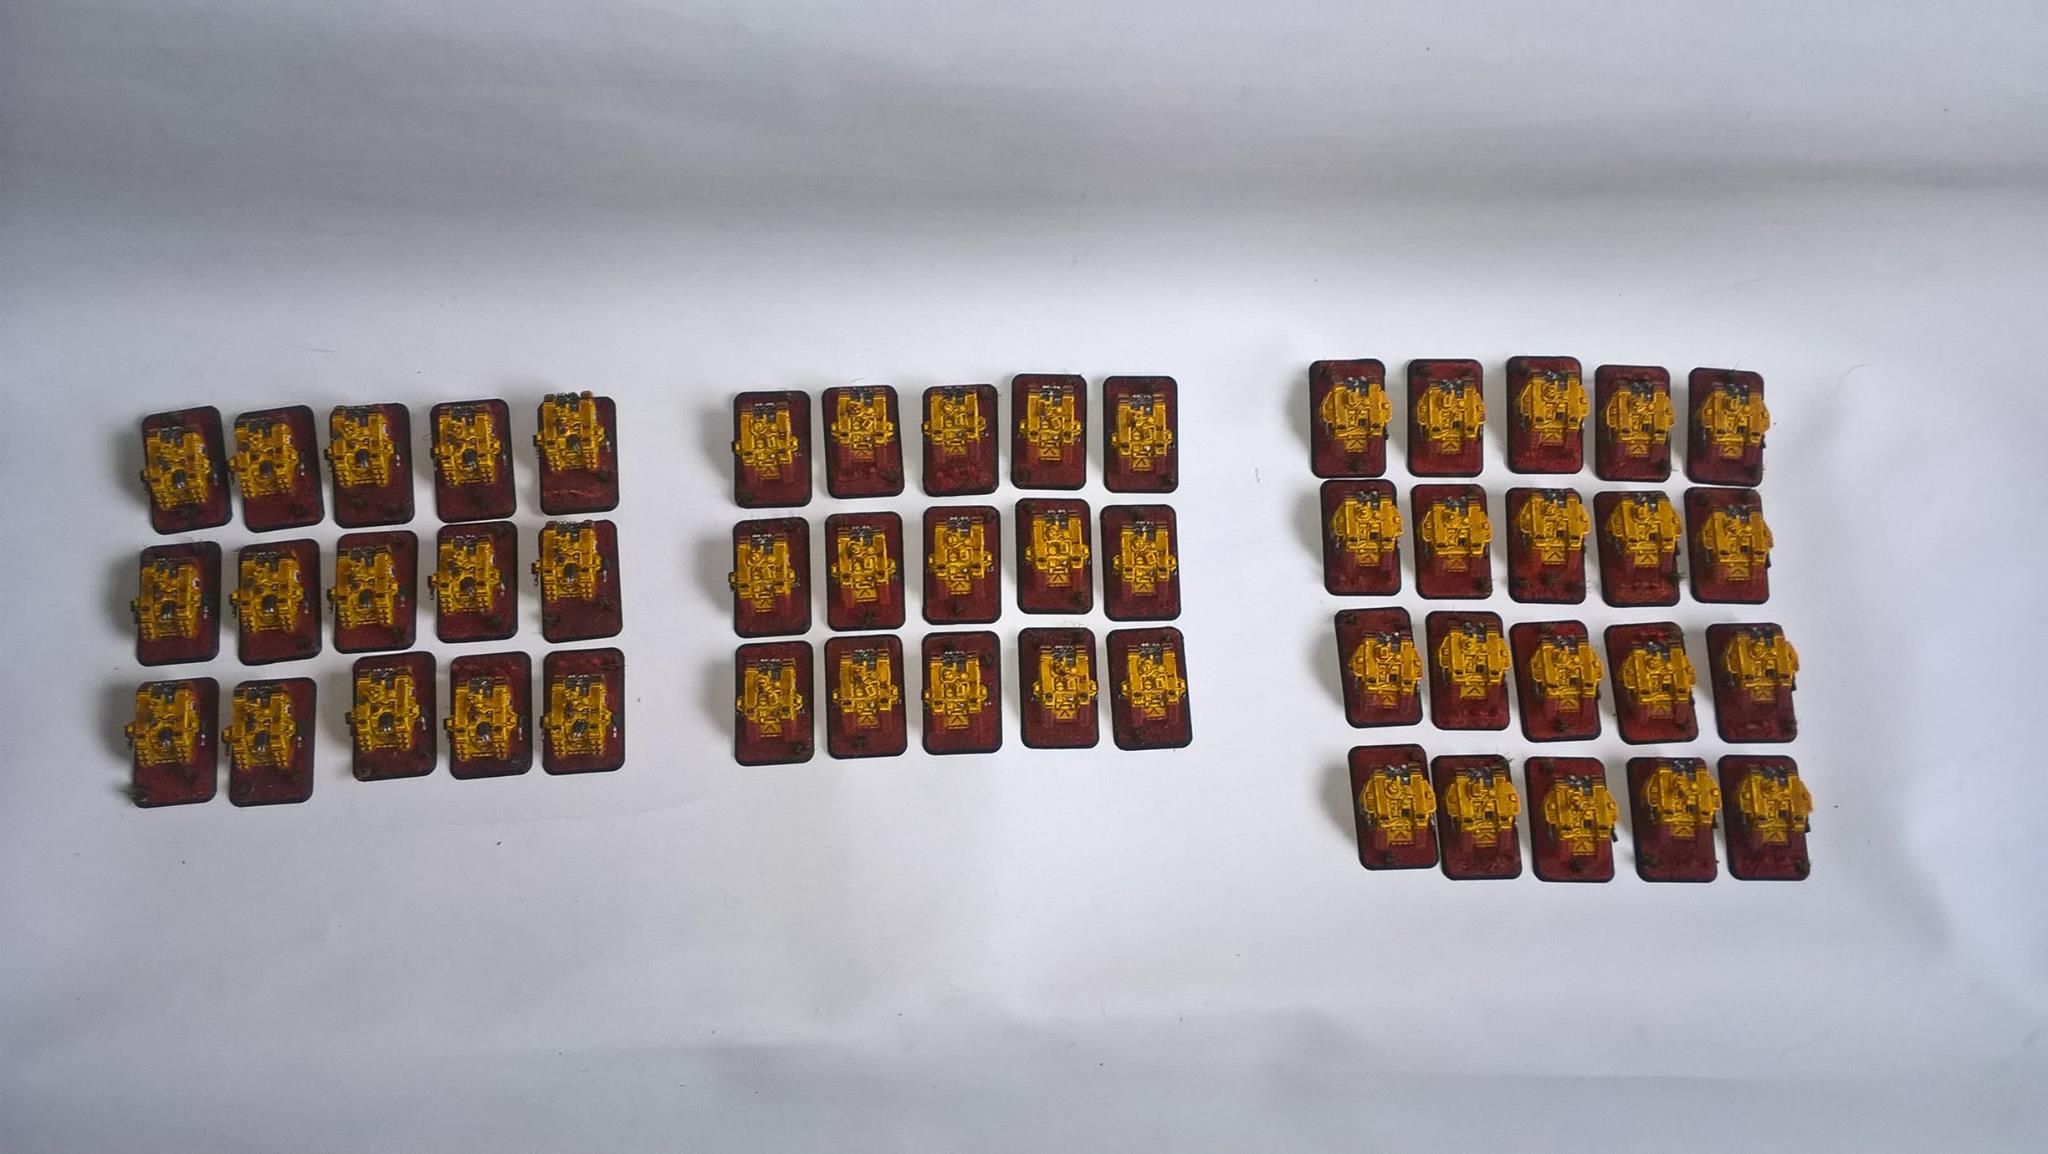
Infantry.
The infantry were super detailed, having special and heavy weapons, assault marines with separate arms and terminators required built also. These were based on square bases that have 5 guide holes so that they sit flush. a slow process of basing was required due to the feet, it took a long time to finish the infantry bases, but when they were done this element tied into the project smoothly.
Air wing.
The air wing was a heavy element containing marauders, thunder hawk mk 2 and mk 3, drop ships, thunderbolts and more. The bases for these included heavy duty flight stems, these needed to blended into the base profile with milleput. Due to the base sizes I could add additional space marines and provide some additional detail to break them up. The chapter also included a large number of drop pods.
Fast attack.
The fast attack elements consisted of bikes, speeders, and attack bikes. These were mounted on to mdf bases. Either 2 to a base or singular.
Rhino.
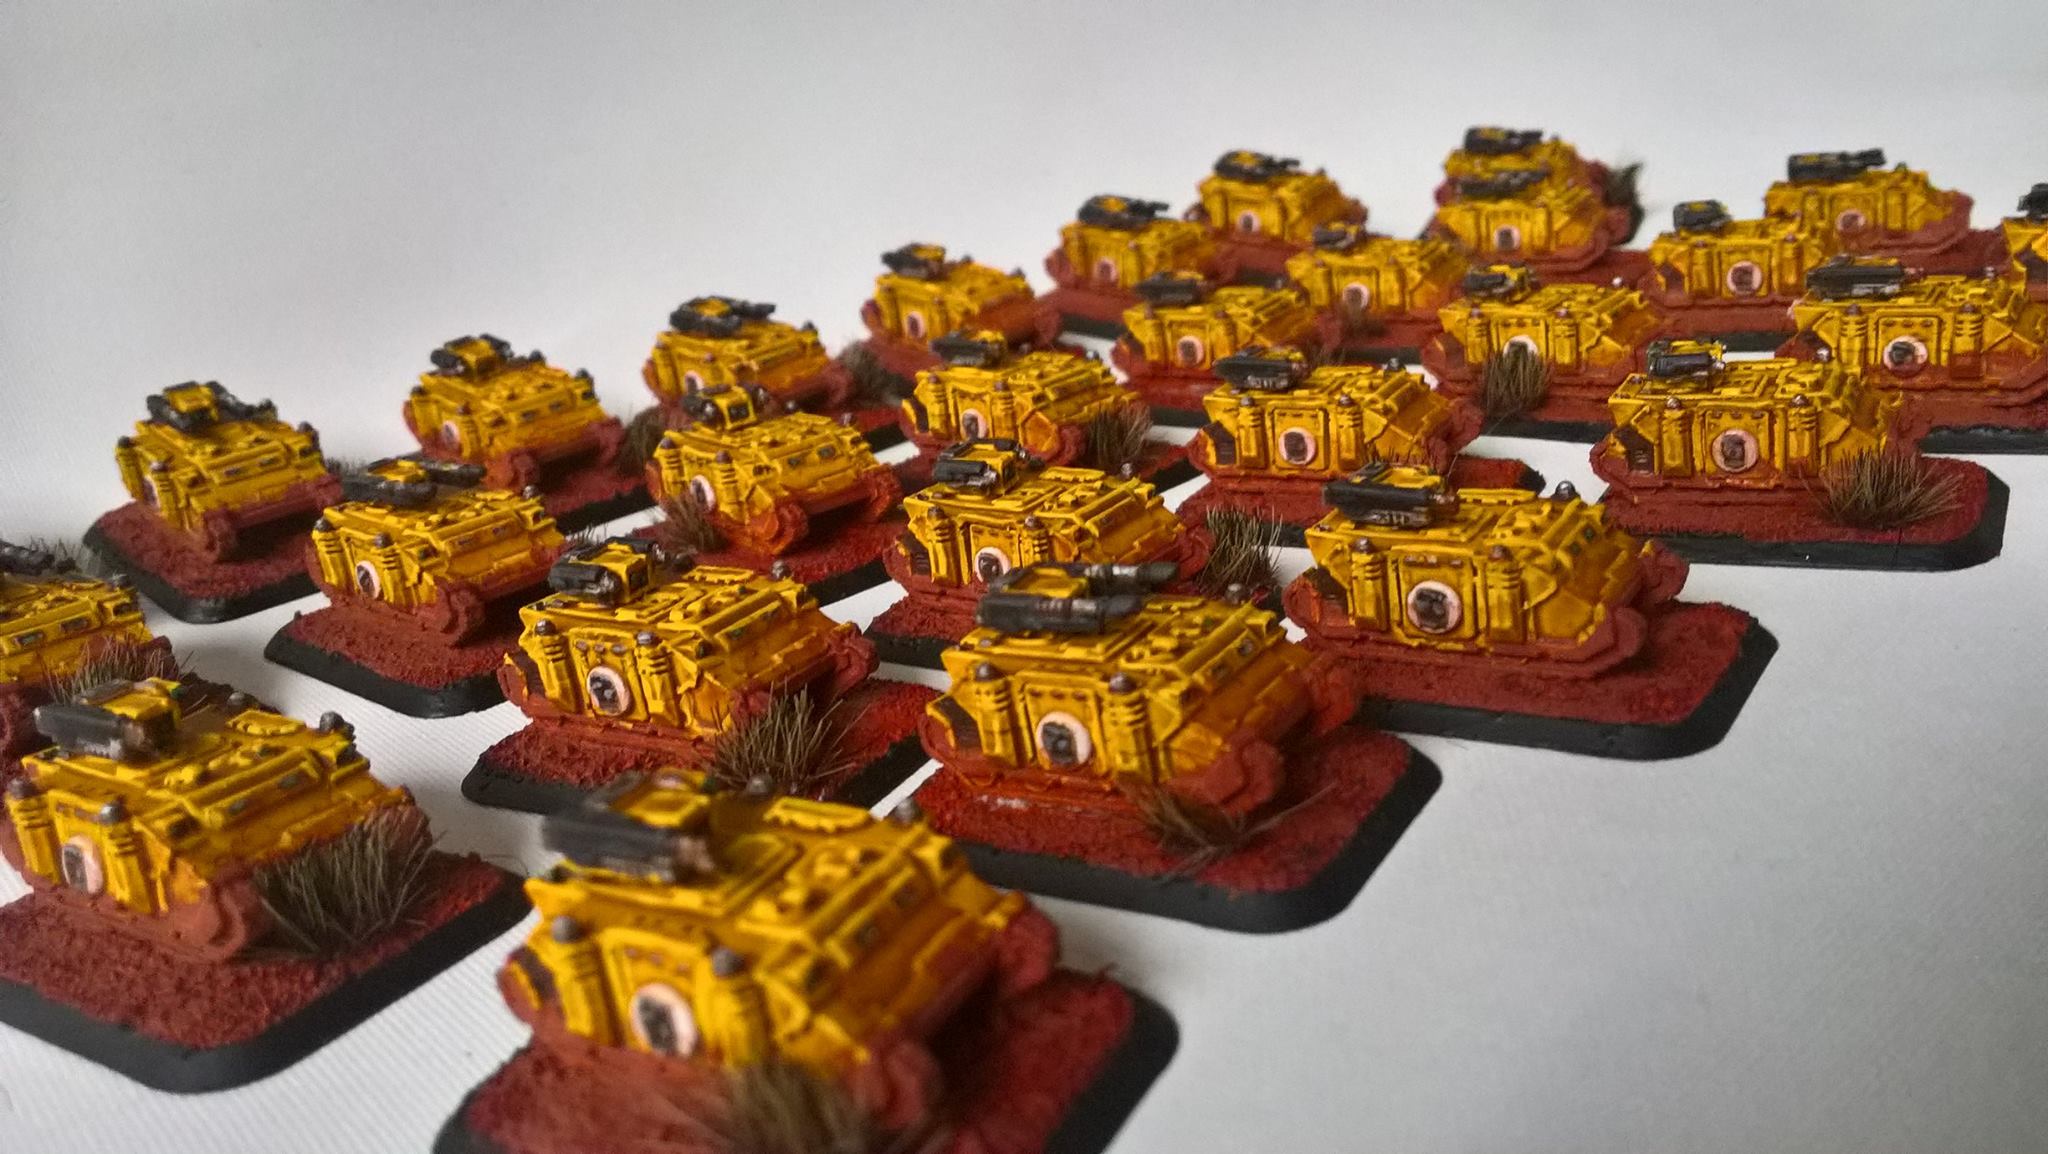
The rhino chassis was the weight in the project with its options, be it whirlwinds, and mobile artillery, to the predator line battle tanks and all the variants in between. Having a shipment of the new to 40k stalker and hunter variant was a surprise, although tbh, lacked the detail of the other tanks. Each company had a lead tank. these were depicted with a radio wire made from fishing line, allowing some flex to avoid damage.
Landraider.
The Landraider chasis did not end up lacking, all the variants were there, from the Crusader, Hyperious, Prometheus, and Achilles to name a few. On top of the variants were a few company’s of mk2b, I am a massive fan of this chassis, its slopped armour and blocky design, legion doors and different weaponry marking them out. As with the Rhino chassis the land raiders all received the command tank per company.
Multiple boxes later and I receive the last components to build, or so i believed, (step up the Liberians and their missing command rhinos) with more bases, vanguard miniatures, and even more neat stuff to paint. Only a few of the vanguard were used, predominantly the terminator looking ones. I feel this diluted the project, But with so much in it, Thankfully, the vanguard soon became lost in the yellow sea of the fist chapter. The last box was a heap of Centurion’s. These little yellow suits amassed into a company themselves and are great wee models, their different stances and weapons were very clear.
Through out the painting process I looked to add as much detail as possible to break up the sea of yellow. Adding decals, free hand company markings, d-day bars, and as much individuality as possible without breaking up the Imperial Fist chapter theme.
Quickshade is a fantastic product. I used the properties of the product to add a hard wearing gloss varnish, and a wash letting it tone down the yellow to a more eye pleasing tone.
After the highlights and pigments, a varnish of matt was used knocking the gloss shine off, and to fix everything into place.
With the project coming to a close, the last units were being worked on and going through the final snag list, the time for kr multicase to step in and help get this order in the best state to transport the 4000 miles to its final destination. With the tanks being mounted on flames of war bases, this made getting the correct size for the majority of the project a simple task, with kr staff more than happy to help in this regard.
In total cases were required for the chapter.

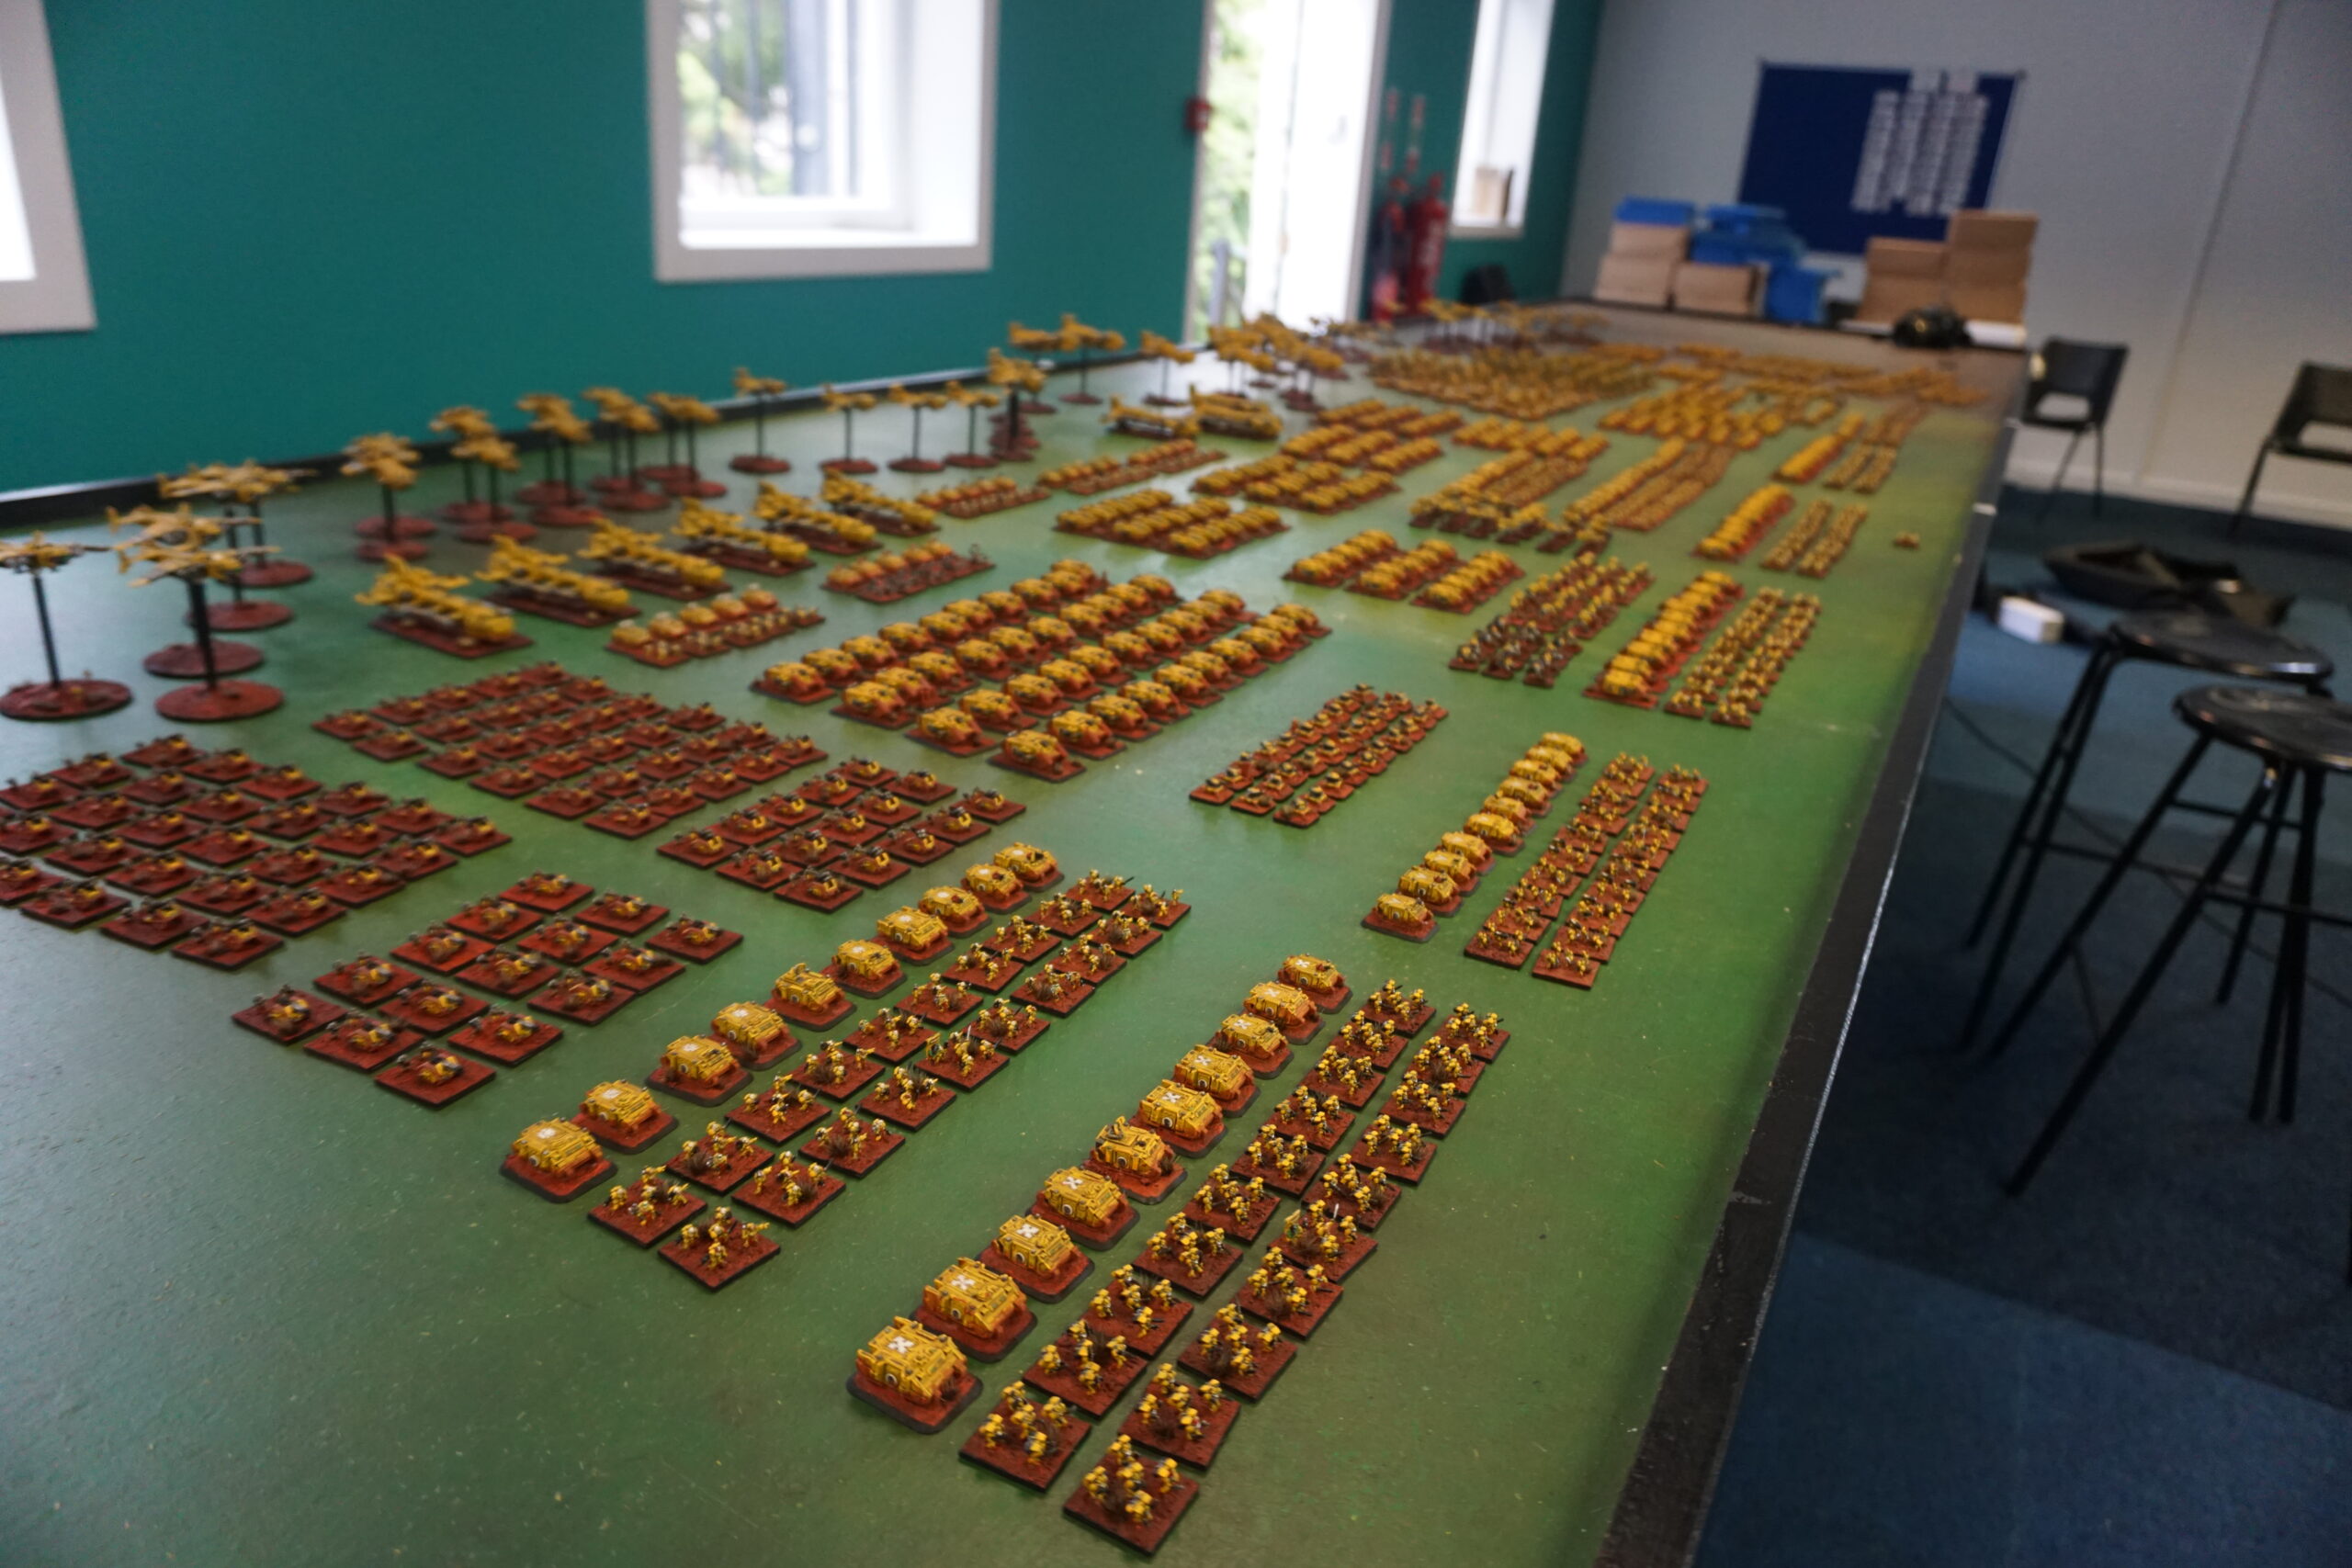
Sadly my camera skills from this time are very lack lustre. I was new to film production and unfortunately this shows. This is the only regret about the project. Although it wasn’t for the lack of trying. A whole heap of work in progress pics, as well as completed unit shots were gathered at home. The finished chapter was then transported to common grounds in Stirling for a photo shoot and video, as the tables were large enough at this venue for a family photo, there was no other way to get it all on a table.
With this the project was now ready for release.
Postage to the states was straight forwards, no scrimping on insurance or cheap post. Then it hit customs. This was a stressful time, the 2 boxes arrived in America and were shown as out for delivery. One box arrives without issue, so it was strange that one would arrive but not the other. The delayed box seemed to be recalled mid transit to be investigated further. Forms were sent, and many phone calls later the project was ready for them to release. My client had his project on table on the 5th October 2021. The issue I now believe could have been the repair kit I sent across containing sand and paint, or the 7 resin models, that would have looked strange in the x ray. Lesson learnt to always check the import laws and file in detail.
The owner was a very happy guy when they finally reached his door. With only a few receiving minor damage, believed to be from the customs department themselves checking the materials.
This is without doubt the largest commission in terms of number that I have worked on to date. It taught me a fair deal.
Here is a link to the you tube video
Here are just a few pics…
Check out my social media accounts for more photos folks.
No responses yet